Configure Amazon listing attributes in the Creation Profiles
When a new listing is added to the Amazon catalog, Amazon requires as much information about the product as possible. This information can be added via the Creation profile in Salestio.
NB! To create a new Amazon Listing, it's important to have a product Barcode (UPC/EAN) or have a GTIN exemption active in your account. You can find more details of the GTIN exception in this article — How to Activate GTIN exemption
To add a new Creation profile, go to Salestio > Profiles > Creation profiles. Click the "Add Creation profile" button.
The Creation profile consists of 2 parts. The first one relates to the settings for all mappings inside the Creation profile. The second part is the actual mappings.
A mapping in the Creation Profile is a rule that sets the correspondence between the selected Shopify product types, categories, and collections from one side and the Amazon category with the required data from the other side.
Here we dive deep into the settings for both parts of the Creation profile.
Start with giving a Name to the Creation profile. The name will help you to identify this Creation profile between other profiles that you might want to add at a later point.

The Creation profile is added for one marketplace. Select the marketplace where you want to create new Amazon listings. In the next steps, you will need to select the Amazon category. The category depends on the marketplace. If you are listing on multiple marketplaces, please note that the category structure might be a bit different on different marketplaces.
The Listing title and Listing description are set to the default values to send the exact information from the Shopify product pages to Amazon.
The Listing Brand name by default is set to use the Vendor information from the Shopify product page.
The number of images can be set through the slider. The images are passed to Amazon in the same order that they are shown on the Shopify product page.
Add a mapping configuration
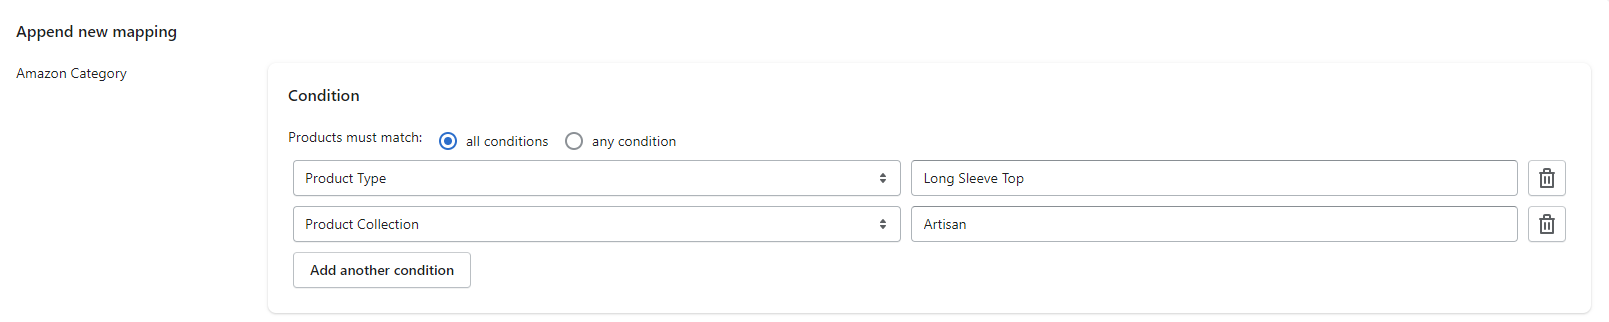
The mapping condition in the Creation profile can be set for the Shopify Product Types, Product Categories, and/or Shopify Collection. It is also possible to use a combination of all of them.
If you would like to set the conditions for all of them, use the "All conditions" radio button. If the mapping can be applied for any of the conditions, select the "Any condition" radio button.
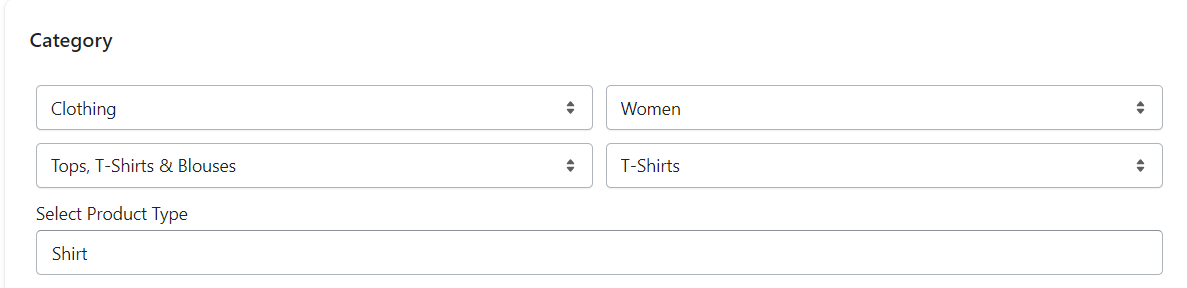
In the next step, select the Amazon category where the products should be placed. In this article, we show the product creation process for the Clothing category on Amazon.
The Product Type should be added depending on your products. This is an auto-complete field. You can start typing the product type value and highlight the needed result. Please note that the Product types should be selected only from this list. Custom data that is not on the list will result in an error when sending the products to Amazon.
The next 5 fields are the Bullet points. The Bullet points, also known as key features, are the required fields on Amazon. Salestio allows setting the bullet points in two ways. The first one is setting a custom value. This solution will work for you if you would like to add the most general data that works for your Shopify products.
Another option to configure the Bullet points is to use the metafields from Shopify. The metafields can be added to every Shopify product page to transfer the Bullet points.
Salestio supports the metafields data that you can set in the Custom data in the Shopify Settings as well as using the third-party apps to add the metafields. The metafields should be added to the Shopify product pages first. Then, it will be possible to configure them here. The detailed guide on how to use Shopify metafields in Salestio is described in this article.

After the product type is selected, you will be presented with the list of the available fields to add data. These are the all fields that are available on Amazon when creating a new listing. Some of them are required, others are optional. The required fields depend on the selected Amazon category and product type.
Please find more details on the required fields for the most common Amazon product types here.
These fields can be configured with the set data that will work for all products within this mapping. Another option is to configure the metafields on Shopify and use them for these fields. They can be configured the same way as we mentioned for the Bullet points at the beginning of this article.
If you would like to list the products with variations, check this guide on the additional configuration.
Other configurations and products send
Once the mapping is added, save the mapping and save the whole Creation profile form. You can add as many mappings as you want to the Creation profile.
Then, you should assign the Creation profile to the Amazon profile. To do so, go to Salestio > Profiles > Amazon profiles. There you can enable product creation, allow variations, and allow sending the products without barcodes (GTIN exemption).
Here we have a detailed article on the Amazon profiles in Salestio.
Once profiles are added, you can proceed to send products to Amazon. The products are sent from the Selling List. If you have not yet created the Selling List, please check the instructions on how to do so in this guide.
The products appear in the Not Linked statuses in the Selling List. If you have already tried sending the new products before configuring the Creation profile, the status might also show the Linking Error.
Select the products, and click the "Send to Amazon" button.
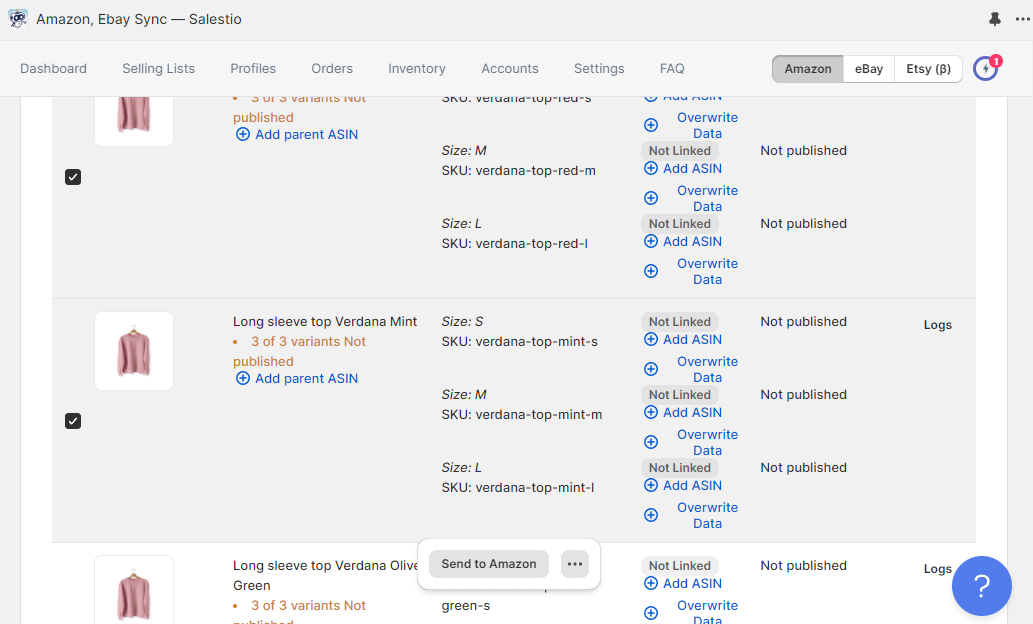
The sending process can take up to 30 minutes. If any of the required fields were not configured, the product might still be in the Linking Error status. Click the Logs link to find out the required fields.
If the status is Linked, you can check the products on your Seller Central account. Please note that the price and quantity can be displayed on Seller Central with a bit of a delay.
View Drafts in Seller Central
If the products are Linked in the Selling List but for some reason aren't shown in your Seller Central inventory, please check them in the Drafts. The seller might be missing Amazon's permission to sell the products, or some other product information is required.
To access the Complete Your Drafts dashboard, select Complete Your Drafts from the Catalog drop-down menu. Or, go to the List Your Products page and click View my drafts under Complete your listings.